In summary:
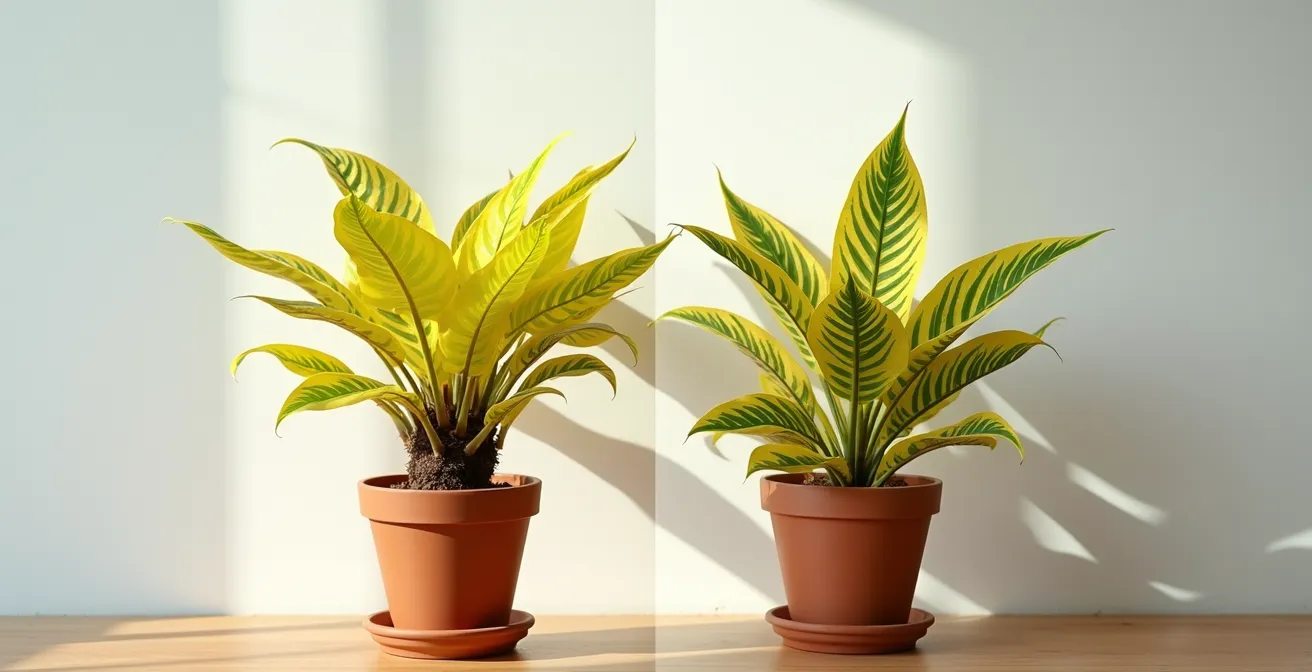
- Yellow leaves are a symptom, not a diagnosis. The location and pattern of yellowing are your most important clues.
- Overwatering is often the culprit, confirmed by a mushy stem and foul smell, indicating irreversible root rot.
- Nutrient deficiencies have distinct patterns: nitrogen yellows old leaves, while iron yellows new leaves between green veins.
- Environmental factors like soil pH, repotting shock, and even dust can cause yellowing by stressing the plant or blocking energy production.
- Always diagnose before treating. Simple tests, like checking soil pH or wiping leaves, can prevent misdiagnosis and further damage.
That first yellow leaf. It appears overnight and sends a wave of panic through any plant owner. The immediate reaction is often to grab the watering can or a bottle of fertilizer, but acting on instinct can do more harm than good. The internet is full of generic advice, suggesting everything from “too much water” to “not enough light.” While these are possibilities, they are not a diagnosis. Treating your plant without understanding the root cause is like taking medicine for a fever without knowing the illness.
The key to saving your plant lies in shifting your mindset from a worried owner to a calm, observant plant doctor. The truth is, your plant is communicating with you. That yellow leaf is a specific signal, and the secret to decoding it is in the details. Is the yellowing uniform, or does it follow the veins? Is it on the old, lower leaves or the fresh, new growth? Is the stem firm or soft? Can the yellowing be wiped off? These are the questions that lead to an accurate diagnosis. A yellow leaf from a nutrient issue looks vastly different from one caused by root rot.
But what if the problem is hidden in the soil itself, with an incorrect pH blocking nutrients? Or what if your well-intentioned care, like over-fertilizing, is the real problem? This guide moves beyond the guessing game. We will provide a diagnostic framework, walking you through a series of visual checks and simple tests. You will learn to differentiate between similar-looking symptoms, understand the underlying mechanisms, and apply the correct treatment with confidence. By the end, you won’t just be treating a symptom; you’ll be healing your plant from the root up.
This article provides a structured approach to plant diagnostics. To help you navigate the various symptoms and solutions, the following summary breaks down each key area we will investigate.
Summary: A Plant Doctor’s Diagnostic Manual for Yellow Leaves
- Acid or Alkaline: Why Your Blueberries Are Not Growing?
- The “Mushy Stem” Sign That Means It’s Too Late to Save Your Plant
- Powdery Mildew: How to Stop It Spreading to Your Cucumbers?
- Nitrogen, Phosphorus, Potassium: Which One Does Your Plant Actually Need?
- The “Shock” Protocol: What to Do After Repotting Goes Wrong?
- Nitrogen Overload: Are You Feeding the Pests with Too Much Miracle-Gro?
- Why Dusty Houseplant Leaves Are Starving for Energy?
- Gypsum: The Miracle Mineral That Loosens Clay Without Changing pH?
Acid or Alkaline: Why Your Blueberries Are Not Growing?
Sometimes, the cause of yellow leaves is completely invisible, hidden within the soil itself. This is especially true for acid-loving plants like blueberries, azaleas, and rhododendrons. You can provide the perfect amount of water and fertilizer, but if the soil pH is too high (alkaline), the plant simply cannot absorb essential nutrients like iron. This leads to a specific type of yellowing called iron chlorosis, where new leaves turn yellow while the veins remain green. It’s the plant’s way of showing it’s starving, even when food is available.
Blueberries, for instance, are notoriously picky. They thrive in a very narrow window, requiring a soil pH between 4.5 and 5.5 to flourish. According to guidelines from Pacific Northwest pest management, most standard garden soils, especially in regions with limestone, are far too alkaline. Without acidic soil, the plant’s roots are chemically “locked,” unable to take up iron, leading to stunted growth and pale, sickly leaves. The problem isn’t a lack of nutrients in the soil, but a lack of access.
Before you add any iron supplements, you must first test your soil’s pH. You can do this easily at home with a simple slurry test using a pH meter or test strips. If the pH is above 5.5, your primary goal is to acidify the soil using amendments like elemental sulfur or sphagnum peat moss. Correcting the pH is the only way to unlock the available nutrients and allow the plant to heal itself, eventually turning those yellow leaves back to a healthy green. Ignoring the pH is like trying to fill a locked car with gas—the fuel is there, but it can’t get in.
The “Mushy Stem” Sign That Means It’s Too Late to Save Your Plant
Of all the symptoms a sick plant can show, a mushy stem is the most definitive and dire. While yellow leaves can signal a dozen different recoverable issues, a soft, collapsing stem base points to only one diagnosis: advanced root rot. This condition, almost always caused by chronic overwatering, means the root system has been deprived of oxygen, died, and begun to decay. The rot then travels up the vascular system into the stem, turning its once-firm structure into a soft, waterlogged pulp.
A simple diagnostic procedure, the “Stem Squeeze Test,” can confirm your fears. Gently pinch the base of the stem between your thumb and forefinger. A healthy or underwatered plant will have a firm, resilient stem. In contrast, a stem afflicted with advanced rot will feel soft and squishy, often collapsing under gentle pressure. You might even see a brownish fluid seep out. This symptom is frequently accompanied by a distinct sour or foul odor coming from the soil, which is the smell of decaying roots. At this stage, the plant’s circulatory system is compromised beyond repair, and saving the entire plant is usually impossible.
The image below illustrates the stark difference between healthy, vibrant tissue and the dark, collapsed cells of a rotting stem. This visual cue is your final confirmation.
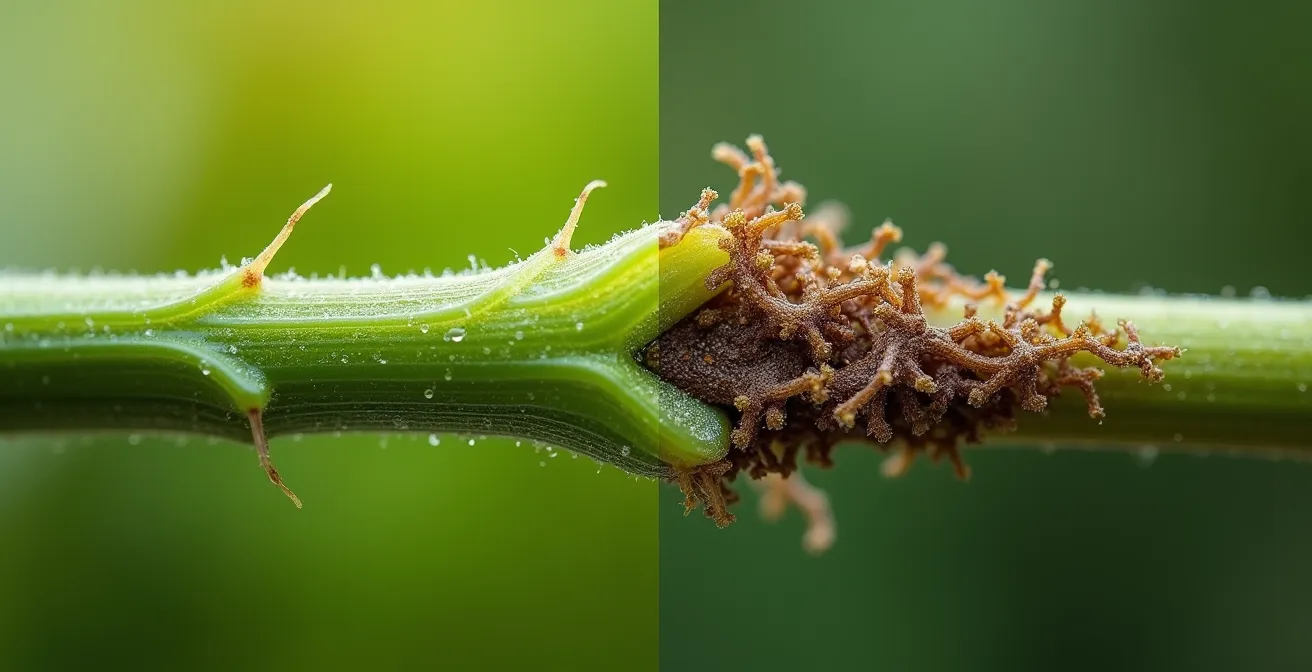
Once you see a mushy stem, your role as a plant doctor shifts from treatment to triage. The main plant cannot be saved because its foundation—the roots and stem base—is gone. However, you may still be able to perform emergency surgery by taking cuttings from the upper, healthy parts of the plant for propagation. Discard the rotted base and soil immediately to prevent the spread of fungal pathogens to other houseplants.
Powdery Mildew: How to Stop It Spreading to Your Cucumbers?
Not all white residue on leaves is created equal. A worried plant owner might mistake hard water stains or a simple layer of household dust for something more sinister. However, a white, flour-like coating that spreads in circular patches, especially on plants like cucumbers, begonias, and roses, is the tell-tale sign of powdery mildew. This is a common fungal disease that thrives in high humidity and moderate temperatures. Unlike dust, it’s a living organism that saps nutrients from the plant, causing leaves to yellow, distort, and eventually die.
The critical first step is accurate identification, as the treatment for a fungus is very different from a simple cleaning. A “wipe test” is your best diagnostic tool. Dust or hard water residue will either wipe away cleanly or feel crusty and difficult to remove. Powdery mildew, on the other hand, will smear when wiped but won’t be completely removed, often leaving a yellowish or gray stain underneath. It also has a distinct growth pattern, starting as small spots and spreading outward, eventually covering the entire leaf surface, and can appear on both the top and bottom of leaves.
The following table provides a clear diagnostic guide to help you differentiate between these common look-alikes. As noted in a guide on leaf damage from the Royal Horticultural Society, correctly identifying the cause is paramount before any treatment is applied.
| Symptom | Powdery Mildew | Dust | Hard Water Stains |
|---|---|---|---|
| Appearance | White, powdery coating | Gray, uniform layer | White, crusty spots |
| Wipe Test | Smears when wiped | Removes easily | Difficult to remove |
| Growth Pattern | Spreads over time | Accumulates slowly | Appears after watering |
| Location | Both leaf surfaces | Top surface mainly | Where water droplets dry |
Once confirmed, stopping its spread is crucial. Immediately isolate the infected plant to protect others. Increase air circulation around the plant by using a small fan or moving it to a less crowded area. For treatment, you can remove the most affected leaves and apply a fungicide. Organic options like neem oil, potassium bicarbonate solutions, or even a simple milk spray (one part milk to two parts water) can be effective in changing the leaf’s surface pH, making it inhospitable to the fungus.
Nitrogen, Phosphorus, Potassium: Which One Does Your Plant Actually Need?
When leaves turn yellow, the knee-jerk reaction is often to assume a nutrient deficiency and reach for a generic, all-purpose fertilizer. This is a gamble. Applying the wrong nutrient can fail to solve the problem and may even make it worse. The key is to read the plant’s signals, as different deficiencies create very specific patterns of yellowing (chlorosis). The location of the yellowing—whether it starts on old or new leaves—is your most important diagnostic clue.
Mobile nutrients, like Nitrogen (N), can be moved by the plant from older leaves to support new growth. Therefore, a nitrogen deficiency will almost always appear first as uniform yellowing on the older, lower leaves. In contrast, immobile nutrients, like Iron (Fe), cannot be moved. A deficiency will therefore appear on the youngest, newest leaves first, typically as interveinal chlorosis (yellow leaves with green veins). Potassium (K) deficiency often presents as yellowing along the edges or margins of the leaves, giving them a burnt or “scorched” look.
As Sandra Mason of the University of Illinois Extension explains, this simple observation is a powerful diagnostic tool:
According to Schuster one way to separate iron deficiency from other deficiencies is to determine what foliage turned yellow first. Iron deficiency starts on young terminal leaves and later works inward to the older leaves. However, deficiencies in manganese, zinc or nitrogen develop on inner or older leaves first and then progress outward.
– Sandra Mason, University of Illinois Extension
This table, based on information from a University of Illinois Extension guide, maps these visual cues to help you make an accurate diagnosis. Once identified, you can apply a specific nutrient supplement rather than a generic fertilizer. If caught early, leaves yellowed by a nutrient deficiency can often regain their green color once the nutrient is provided.
| Nutrient | Affected Leaves | Visual Pattern | Other Symptoms |
|---|---|---|---|
| Nitrogen (N) | Older, lower leaves first | Uniform yellowing | Stunted growth, poor vigor |
| Iron (Fe) | New, new growth first | Yellow with green veins | Interveinal chlorosis |
| Potassium (K) | Leaf edges | Yellow/brown margins | Crispy edges, scorching |
| Magnesium (Mg) | Older leaves | Interveinal yellowing | Reddish tints possible |
The “Shock” Protocol: What to Do After Repotting Goes Wrong?
Repotting is a necessary but stressful event for any plant. Even with the gentlest touch, some root disturbance is inevitable. This often leads to a condition known as transplant shock, where the plant temporarily droops, wilts, or develops yellow leaves as it diverts energy to repairing its damaged root system. For a plant owner, seeing a recently “helped” plant suddenly look worse can be alarming. The key is to understand that a small amount of yellowing is a normal response, and the correct action is often to do less, not more.
The most common mistake after repotting is to overcompensate with water or fertilizer. Damaged roots are unable to absorb much water, leading easily to root rot. They are also extremely sensitive to the salts in fertilizer, which can cause fertilizer burn and kill them off entirely. The post-repotting period is a time for recovery, not for force-feeding. Place the plant in a location with slightly lower light than usual to reduce the demands on its leaves for photosynthesis. The goal is to create a low-stress “recovery room” environment.
The following weeks are a test of patience. You should expect some of the lower, older leaves to yellow and drop; this is the plant shedding non-essential parts to conserve energy for root repair. You should only remove leaves that are fully yellow or brown. Monitor the soil moisture carefully, watering only when the top inch or two is dry. Resist the urge to fertilize for at least a month.

If the yellowing is extensive, continues for more than a few weeks, or affects new growth, it may signal a more serious problem, such as major root damage during the repot. At that point, a gentle inspection of the root ball may be necessary. But for most cases, a hands-off, patient approach is the best medicine.
Nitrogen Overload: Are You Feeding the Pests with Too Much Miracle-Gro?
In our eagerness to help our plants thrive, it’s easy to be too generous with fertilizer. We see lush, green growth and assume we’re doing everything right. However, an excess of nitrogen—the primary component for leafy growth in many popular fertilizers—can create a host of hidden problems. While a little is good, too much forces rapid, weak, and succulent new growth. This soft tissue is not only structurally weak but is also a dinner bell for sap-sucking pests like aphids and mealybugs, who find it much easier to pierce than tougher, slow-grown foliage.
The visual signs of nitrogen overload can be misleading. You might see extremely dark green leaves, but this is often accompanied by a lack of flowers or fruit, as the plant pours all its energy into foliage. In more severe cases, the excess nitrogen salts in the soil can “burn” the roots, impairing their ability to absorb water. This root damage paradoxically causes symptoms that look like underwatering: wilting, and yellowing or browning leaves, especially at the tips and margins. You’re giving it too much of a good thing, and it’s causing a system-wide failure.
If you suspect you’ve been over-fertilizing, the immediate treatment is a “detox.” You need to flush the excess mineral salts from the soil. This process, known as leaching, involves slowly pouring a large volume of water through the pot and letting it drain away completely. This washes the built-up fertilizer salts out of the root zone, giving the roots a chance to recover. It’s a critical intervention to prevent permanent root damage.
Action Plan: Fertilizer Flushing Protocol
- Stop all fertilizer applications: Immediately cease using any liquid or granular fertilizers to prevent adding more salts to the soil.
- Initial slow watering: Take the plant to a sink or bathtub. Slowly water the soil with a volume of lukewarm water equal to at least three times the pot’s volume.
- Ensure complete drainage: Allow all the water to run freely through the pot’s drainage holes. Do not let the pot sit in the runoff water, as the soil will reabsorb the flushed-out salts.
- Repeat the flush: After about 30 minutes, repeat the entire flushing process to remove any stubborn, residual salts from the soil.
- Resume feeding cautiously: Wait at least two to three weeks before fertilizing again. When you do, use a balanced fertilizer at half the recommended strength and frequency.
Why Dusty Houseplant Leaves Are Starving for Energy?
It’s easy to overlook a thin layer of dust on your houseplants, dismissing it as a minor aesthetic issue. But from your plant’s perspective, that dust is a thick blanket blocking its only source of energy. Leaves are the plant’s solar panels, filled with chlorophyll to perform photosynthesis—the process of converting light into the chemical energy it needs to live and grow. When a layer of dust accumulates, it physically obstructs sunlight from reaching the chlorophyll, effectively starving the plant.
As the IFA Cooperative’s blog eloquently puts it, light is life for a leaf. Without it, the leaf has no purpose.
Leaves are the solar panels of the plant; the place where their energy is produced. When a plant becomes thick and bushy, it sometimes blocks light from reaching inner and lower leaves. These leaves cannot photosynthesize and chlorophyll production comes to a halt.
– IFA Cooperative, IFA’s Helping to Grow Blog
A plant that is “starving” for light due to dust will begin to sacrifice its least efficient leaves. Typically, the older, lower leaves will start to turn a pale, uniform yellow and eventually drop off. This is the plant’s survival mechanism: it’s cutting its losses and redirecting its limited resources to the upper leaves that are still receiving some light. While this is a natural response, it’s a clear signal that the plant is under stress and not operating at full capacity. The same symptom can occur if a plant is simply placed in a location that is too dark for its needs.
The solution is simple but crucial: regular cleaning. For smooth-leaved plants, gently wipe both the top and bottom of each leaf with a soft, damp cloth. For fuzzy-leaved plants like African violets, where water can cause spots, use a soft brush (like a mushroom brush or a clean paintbrush) to gently whisk the dust away. Making this a regular part of your plant care routine is as important as watering. A clean plant is an efficient plant, able to make the most of the available light to fuel its growth and stay healthy.
Key Takeaways
- Observe First, Act Second: The location, pattern, and texture of yellow leaves are your primary clues. Never treat without a diagnosis.
- Water is the Usual Suspect: Overwatering (leading to root rot) and underwatering are the most common culprits. Always check soil moisture deep in the pot, not just the surface.
- Read the Deficiency Map: Nitrogen deficiency yellows old leaves; iron deficiency yellows new leaves. Matching the symptom to the nutrient is critical for effective treatment.
Gypsum: The Miracle Mineral That Loosens Clay Without Changing pH?
For gardeners battling heavy, compacted clay soil, the cycle of problems can be frustrating. Clay soil has poor drainage, leading to waterlogged roots, a primary cause of yellow leaves and root rot. Many traditional soil amendments can help, but they often come with a side effect: they alter the soil’s pH. Adding lime raises pH, while adding peat moss or sulfur lowers it. This presents a dilemma for gardeners who need to improve drainage without disrupting the delicate pH balance required by their plants. This is where gypsum, a mineral compound of calcium sulfate, offers a unique solution.
Gypsum is often called a “clay-buster” for its remarkable ability to improve soil structure. It works through a chemical process called flocculation. The calcium in gypsum causes the tiny, tightly packed clay particles to clump together into larger aggregates. This creates more pore space in the soil, dramatically improving both water drainage and air circulation around the plant’s roots. Healthier roots, free from the stress of constant waterlogging, are better able to absorb nutrients, leading to healthier, greener foliage.
The most significant advantage of gypsum is that it is pH neutral. It provides essential calcium and sulfur without raising or lowering the soil’s acidity, making it a safe choice for a wide range of plants. This is a clear advantage over other amendments, as detailed in an analysis of soil amendments. While organic matter is excellent for overall soil health, and perlite provides aeration, gypsum specifically targets the structural problem of clay compaction in a powerful way.
| Amendment | pH Effect | Drainage Impact | Application Rate |
|---|---|---|---|
| Gypsum | Neutral | High improvement | 40 lb/1000 sq ft |
| Perlite | Neutral | Moderate improvement | 25-30% by volume |
| Sulfur | Lowers pH | No direct effect | 2-3 lb/100 sq ft |
| Organic matter | Slightly acidic | Good improvement | 2-3 inches worked in |
By addressing the root cause of poor drainage at a structural level, gypsum helps prevent the very conditions that lead to yellow leaves. It’s a foundational treatment that creates a healthier environment for the entire plant system, proving that sometimes the best solution isn’t about adding nutrients, but about fixing the soil itself.
Start thinking like a plant doctor today. Instead of reacting with panic, approach each yellow leaf with curiosity. Observe, diagnose, and treat with the confidence that you are giving your plant exactly what it needs to thrive.