The biggest lie in high-fidelity audio is that you need to spend more on gear to get better sound.
- Your room’s acoustics are responsible for over 50% of what you hear, often distorting the sound from even the best speakers.
- Simple, inexpensive acoustic treatments and correct speaker placement offer more audible improvement than thousand-dollar equipment upgrades.
Recommendation: Focus on treating your room first; it’s the highest-impact, lowest-cost upgrade you can make to unlock your system’s true potential.
You’ve spent a significant amount of money on a pair of high-quality speakers, brought them home, and set them up with excitement. But when the music starts, the reality is underwhelming. The sound is boomy, the highs are harsh, and the intricate details you heard in the showroom are completely lost. This frustrating experience is incredibly common among audiophiles and music lovers. The conventional wisdom often sends you down a rabbit hole of expensive “solutions”: buy a more powerful amplifier, invest in exotic speaker cables, or upgrade your Digital-to-Analog Converter (DAC). While every component matters, these upgrades often yield minimal returns.
The problem lies in a fundamental misunderstanding of the source-to-ear chain. Your audio system is only as strong as its weakest link, and for 90% of home setups, that weak link isn’t the hardware—it’s the room itself. Poor room acoustics can sabotage the performance of even the most expensive speakers, smearing sonic details and creating an unbalanced, fatiguing listening experience. What if the key to unlocking pristine audio wasn’t in your credit card, but in understanding the physics of sound in your space?
This guide will deconstruct the real reasons your expensive system sounds bad. We will move beyond the hardware obsession and focus on the three pillars of true audio fidelity: room acoustics, speaker placement, and source quality. By mastering these foundational elements, you can achieve a more significant and satisfying sonic upgrade than by simply buying more gear. We will provide practical, cost-effective strategies to transform your listening environment and finally hear your music the way it was meant to be heard.
To navigate this complex topic, we’ve structured this guide to address the most critical factors influencing your sound, from foundational room treatments to debunking common audio myths. The following sections will provide a clear roadmap to diagnosing and fixing your audio problems at the source.
Summary: Why Your Expensive Speakers Sound Bad and How to Fix It?
- How to Treat Your Room Acoustics for Under $200?
- FLAC vs 320kbps MP3: How Smart Devices Are Reducing Operational Costs by 20% in Offices?
- The Volume Mistake That Damages Your Hearing in Under 15 Minutes
- Vinyl vs High-Res Streaming: Is the “Warmth” Worth the Cost?
- How to Position Speakers for the Perfect “Sweet Spot” in Small Rooms?
- How to Design a VR Room Without Spending a Fortune on Renovation?
- Phone vs Mirrorless Camera: When Should You Actually Upgrade?
- Why Authenticity Beats Production Value in Modern Vlogging?
How to Treat Your Room Acoustics for Under $200?
Before you even consider another hardware purchase, you must address your room. Uncontrolled sound reflections from walls, ceilings, and floors create echoes and frequency imbalances that are the primary culprits behind harsh highs and boomy, undefined bass. Improving your room’s acoustic integrity is the single most effective upgrade you can make. The impact of acoustic treatment is not subtle; as one case study demonstrated, a room transformed with GIK Acoustics panels went from harsh and fatiguing to smooth and crystal clear, proving that acoustics have more impact than expensive equipment. While professional solutions can be costly, a highly effective DIY approach is well within reach.
The most critical areas to treat are the “first reflection points” on the side walls, ceiling, and the wall behind your speakers. These are the surfaces where sound from your speakers bounces once before reaching your ears, causing the most disruptive interference. Building your own absorption panels is a surprisingly simple and affordable project. According to budget studio treatment guides, DIY acoustic panels cost $20-50 each, a fraction of the $150+ price tag for commercial equivalents. Using materials like Rockwool insulation, a simple wood frame, and acoustically transparent fabric, you can construct high-performance panels that absorb mid and high-frequency reflections, leading to dramatically improved clarity and stereo imaging.
Beyond panels, simple additions can make a difference. Heavy curtains, plush rugs, and well-stocked bookshelves all act as diffusers and absorbers, breaking up sound waves and taming echo. The goal is not to create a dead, anechoic chamber but to achieve a balanced room that lets you hear your speakers, not the room’s chaotic reflections. By investing a small amount of time and money in acoustics, you address the root cause of bad sound, unlocking a level of detail and precision your speakers were always capable of producing.
FLAC vs 320kbps MP3: How Smart Devices Are Reducing Operational Costs by 20% in Offices?
Once your room is treated, the next link in the source-to-ear chain is the audio file itself. The debate between lossless formats (like FLAC, WAV) and compressed formats (like MP3, AAC) is often mired in audiophile jargon, but the difference is tangible and has a physiological impact. Compression algorithms work by removing audio data that is considered “inaudible” to the human ear to reduce file size. The problem is that this process can introduce audible artifacts and, more importantly, contribute to listening fatigue. Your brain subconsciously tries to fill in the missing information, which is a mentally taxing process over long periods.
This concept is visualized below, where the pristine, complex structure of a lossless waveform contrasts with the simplified, blocky nature of a compressed file. The loss of nuance and detail is not just a theoretical concept; it’s a measurable reduction in information reaching your ears.
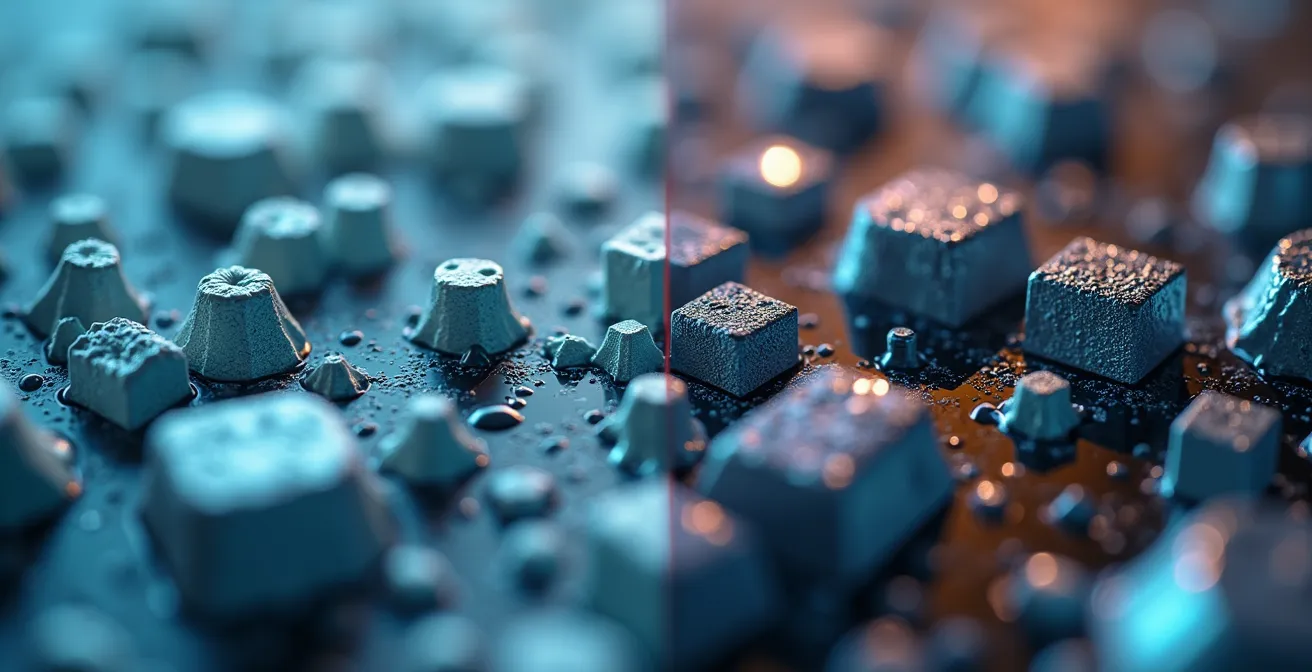
As you can see, the transition from left (lossless) to right (compressed) shows a clear degradation of complexity. An analysis of audio quality confirms this, finding that choosing lossless formats like WAV, FLAC, or AIFF can significantly improve audio quality and reduce the cognitive load on the listener. This allows you to enjoy music for longer periods without feeling tired or irritable. While high-bitrate MP3s (320kbps) are a significant improvement over their lower-quality counterparts, they still lack the full depth and dynamic range of a lossless source. For a high-fidelity system, feeding it compressed audio is like putting regular fuel in a performance sports car—it will run, but you will never experience its full potential.
The Volume Mistake That Damages Your Hearing in Under 15 Minutes
There’s a common impulse when sound is unclear: turn it up. However, this often makes the problem worse and introduces two serious risks: speaker damage and hearing loss. When you push your amplifier beyond its clean power capacity, it begins to “clip,” sending a distorted square wave signal to your speakers instead of a clean sine wave. This distorted signal causes the speaker’s voice coil to overheat rapidly, which can lead to permanent damage. The rattling, crackling, or fuzzy sound you hear at high volumes isn’t the speaker being “pushed to its limit”; it’s a distress signal that damage is imminent.
From a technical standpoint, most home audio systems perform optimally within a specific volume window. While it varies by equipment, audio engineering research confirms that a 60-80% volume range on most receivers provides the best balance of dynamic range and clarity without pushing the amplifier into clipping. Pushing beyond this “sweet spot” not only introduces distortion but also poses a significant risk to your hearing. Listening at levels above 85dB for extended periods can cause temporary or even permanent hearing damage (tinnitus or threshold shift).
Preventing this requires mindful listening and an understanding of the warning signs. You can protect both your equipment and your ears by following a few simple guidelines:
- Listen for Distortion: At the very first sign of crackling or fuzziness, lower the volume immediately.
- Use an SPL Meter: A simple smartphone app can give you a rough estimate of the decibel level. Aim for an average of 75-85dB for engaged listening.
- Ensure Adequate Power: If you consistently have to push your volume past 80% to get satisfying sound, your amplifier may be underpowered for your speakers or your room.
- Take Breaks: Give your ears a rest every hour to prevent fatigue and temporary threshold shift.
Vinyl vs High-Res Streaming: Is the “Warmth” Worth the Cost?
The resurgence of vinyl is often attributed to its “warm” and “authentic” sound. While vinyl has a unique sonic character, pursuing it as a path to higher fidelity is a prime example of the law of diminishing returns in audio. A high-quality digital setup (a decent DAC and a subscription to a high-res streaming service) is vastly more cost-effective and, in many cases, technically superior to an equivalent vinyl rig. The perceived “warmth” of vinyl is often a combination of subtle distortions, a rolled-off high end, and the psychological effect of the physical ritual.
To truly compare the two, one must look at the total cost of ownership, which goes far beyond the price of a turntable. Cartridges wear out, records require cleaning and careful handling, and a quality phono preamp is essential. When you factor in all the components and maintenance, the financial commitment to vinyl becomes clear.
The table below breaks down the typical first-year investment for entry-level and quality vinyl setups versus a high-resolution digital system. The data, based on an analysis of typical audiophile spending, reveals a stark difference in cost for achieving high-quality sound.
| Component | Entry-Level Vinyl | Quality Vinyl Setup | High-Res Digital |
|---|---|---|---|
| Source Player | $300-500 | $1,500-3,000 | $100-300 (DAC) |
| Cartridge/Stylus | $100 (Ortofon 2M Red) | $200+ (Ortofon 2M Blue) | N/A |
| Phono Preamp | $100-200 | $500-1,000 | N/A |
| Maintenance | $50/year | $200+/year | $0 |
| Media Cost | $25-40 per album | $25-40 per album | $10-20/month streaming |
| Total First Year | $800-1,200 | $3,000-5,000 | $220-420 |
As a consensus within the audio engineering community suggests, the pursuit of ultra-high-end gear is often unnecessary for genuine musical enjoyment. The focus should be on building a competent, well-balanced system rather than chasing an elusive, expensive ideal.
94.5% of all listeners would be very happy with a good system for $1000, maybe even $800 if they know how to position speakers and correct for bad room acoustics.
– Audio engineering community consensus, AudioMasterclass user research
For the vast majority of listeners, a well-implemented digital system offers superior convenience, lower cost, and technically perfect sound reproduction without the maintenance and expense of a vinyl collection. The “warmth” of vinyl is a valid aesthetic choice, but it is not an inherently superior or cost-effective path to fidelity.
How to Position Speakers for the Perfect “Sweet Spot” in Small Rooms?
After treating your room’s acoustics, correct speaker placement is the next free, high-impact adjustment you can make. The goal is to create an equilateral triangle between the two speakers and your head at the primary listening position. This setup ensures that the sound from both channels arrives at your ears at the same time, creating a cohesive and stable stereo image—the “sweet spot” where the music comes alive. However, achieving this in a small or irregularly shaped room requires more than just a tape measure; it requires an understanding of how speakers interact with room boundaries.
A critical but often overlooked principle is managing the distance from the walls. Placing speakers too close to the front or side walls can cause “boundary reinforcement,” artificially boosting bass frequencies and making the sound boomy and muddy. Conversely, a specific distance (typically 2-6 feet from the rear wall) can create a “bass null,” where sound waves cancel each other out, leading to thin and lifeless audio. The key is to experiment.
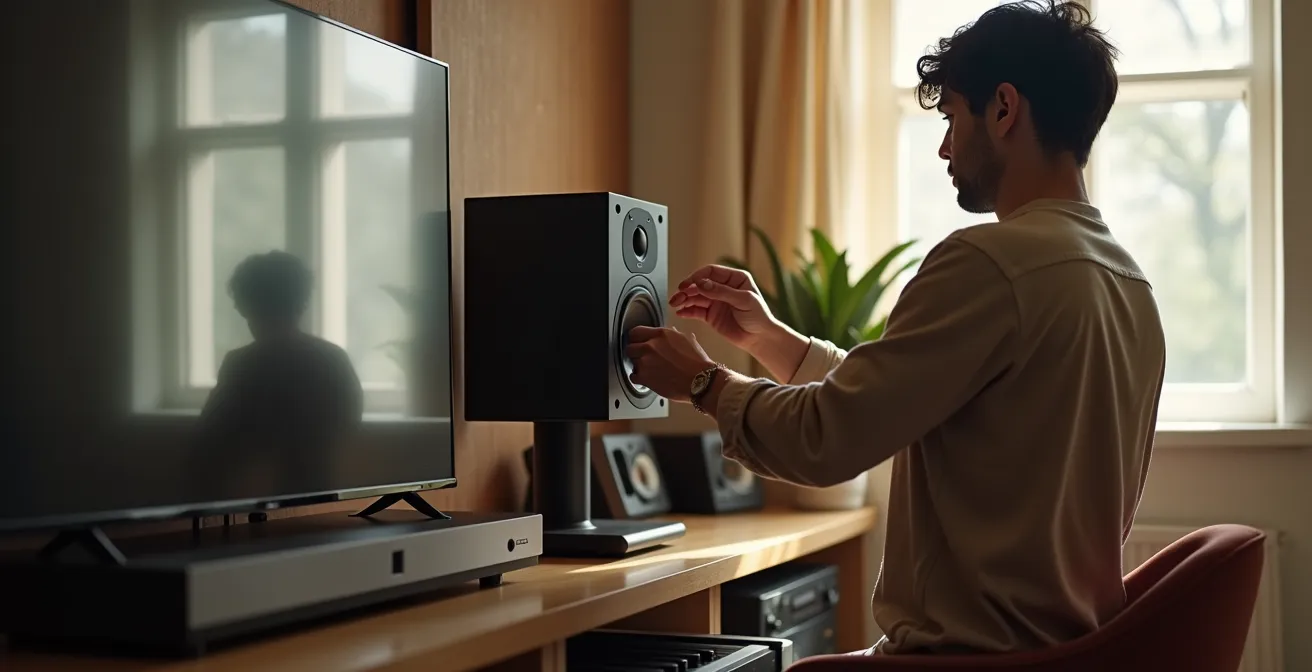
As the image illustrates, the process is one of careful, iterative adjustment. To find the optimal position in a challenging space, sound engineers use several guiding principles. The “38% rule,” for example, is a powerful starting point for finding the best listening position along the length of the room to minimize standing wave issues. From there, you can build your setup with precision.
Action Plan: Mastering Speaker Placement
- Establish Your Listening Position: Start by facing the shortest wall. Apply the 38% rule from an expert guide on speaker positioning by placing your chair so your ears are 38% of the room’s length away from that wall.
- Create the Equilateral Triangle: Position your speakers so the distance between them is equal to the distance from each speaker to your head. This forms the perfect stereo image.
- Manage Wall Distance: In small rooms, either place speakers very close to the wall behind them (less than 1 foot) to leverage “boundary loading” predictably, or pull them far out (more than 7 feet). Avoid the problematic 2-6 foot zone.
- Set Tweeter Height: Adjust your speaker stands or placement so the tweeters (the small high-frequency drivers) are exactly at ear level when you are seated. This is typically 120-140cm from the floor.
- Adjust the “Toe-In”: Angle the speakers slightly inward so they point directly at your listening position or just behind your head. Experiment with the angle to fine-tune the focus of the stereo image.
How to Design a VR Room Without Spending a Fortune on Renovation?
While our focus is on audio, the principles of optimizing a space for an immersive experience extend to other technologies like Virtual Reality (VR). Designing a dedicated VR room isn’t about expensive renovations; it’s about smart, practical space management. Much like audio, the goal is to remove environmental obstacles that break the sense of immersion, whether it’s a stray sound reflection or a coffee table you might trip over.
The first priority is creating a safe, clear play area. You need a minimum of 6.5 x 6.5 feet of unobstructed floor space. Use painter’s tape to mark this boundary on your floor. Any furniture within or near this zone should be removed or be soft and low-profile. Cable management is the next challenge. For PC-based VR, investing in an overhead pulley system is a low-cost, high-impact solution that keeps cables off the floor, preventing tangles and tripping hazards and dramatically enhancing freedom of movement.
Interestingly, optimizing a room for VR often has positive side effects for audio acoustics. To make the space safer, you’ll want to cover hard floors with a thick rug or foam floor mats. To protect your controllers and walls, you might add heavy curtains or even acoustic foam panels to the walls. These very same elements—rugs, curtains, and panels—are exactly what you would use to absorb sound reflections and tame echo for your audio system. By designing a space for one immersive technology, you can inadvertently improve it for another, creating a room that is both safe for VR and acoustically balanced for critical listening.
Phone vs Mirrorless Camera: When Should You Actually Upgrade?
The decision to upgrade from a smartphone camera to a dedicated mirrorless camera mirrors the audiophile’s dilemma of when to spend more money on gear. Modern smartphones take incredible photos, but just like a basic audio setup, they have limitations that become apparent when you demand more creative control. The primary reason to upgrade is not merely “image quality” but the flexibility offered by a larger sensor and interchangeable lenses.
A mirrorless camera’s larger sensor captures significantly more light, resulting in cleaner, more detailed images in low-light situations and offering a much wider dynamic range. Most importantly, the ability to change lenses unlocks true creative expression. You can use a prime lens with a wide aperture (e.g., f/1.8) to create beautiful background blur (bokeh) that a smartphone can only simulate with software. You can use a telephoto lens to capture distant subjects without digital zoom’s quality degradation. You should upgrade when you feel creatively constrained by your phone—when you want to control depth of field, shoot in challenging light, or use specific focal lengths for portraiture or wildlife.
Just as one must diagnose whether a camera upgrade is necessary, you must diagnose the weak link in your audio chain before spending money. Often, the problem isn’t what you think. The following table helps identify common symptoms and their likely, and often low-cost, causes.
| Problem Symptom | Likely Weak Link | Test Method | Cost to Fix |
|---|---|---|---|
| No sound at all | Connection/Cable | Check all connections systematically | $10-50 |
| Distortion/Fuzzing | Source quality or cables | Test multiple devices and sources | $20-100 |
| Lack of bass | Speaker placement | Move speakers closer/further from wall | $0 |
| Harsh/Fatiguing sound | Room acoustics | Clap test for echo/reverb | $200-2000 |
| Poor imaging | Speaker positioning | Check triangle setup and toe-in | $0 |
| Volume limitations | Amplifier power | Check amp/speaker impedance match | $200-1000 |
Key Takeaways
- Your room’s acoustics are the most significant factor affecting sound quality, more so than expensive hardware.
- Correct speaker placement and the use of high-quality, lossless audio sources are free or low-cost upgrades with massive impact.
- The law of diminishing returns applies heavily to audio gear; focus on a balanced system and fundamental principles over chasing expensive components.
Why Authenticity Beats Production Value in Modern Vlogging?
In the world of modern vlogging and content creation, a fascinating trend has emerged: audiences often respond more strongly to raw authenticity than to slick, high-budget production value. A heartfelt story shot on a smartphone can resonate more deeply than a sterile, perfectly lit studio production. This principle holds a powerful lesson for the world of high-fidelity audio. The ultimate goal of an audio system should not be to achieve technical, lab-perfect “production value,” but to facilitate an authentic connection to the music.
Many audiophiles fall into the trap of “critical listening,” where they are listening to their *equipment* instead of the music. They fixate on minuscule imperfections, constantly tweaking and upgrading in a stressful pursuit of an unattainable ideal. The authentic approach, by contrast, is about accepting your system and room’s character and optimizing it for enjoyment. It’s about finding what audio engineers call the room’s “authentic character” rather than fighting it. Experts are increasingly using tools like pink noise and real-time analyzers not to force a room into a theoretical flat response, but to identify and correct only the most glaring problems, preserving the natural sound of the space.
Switching from a mindset of critical perfectionism to one of authentic enjoyment is liberating. It means applying the 80/20 principle: fix the major issues like severe echo or bass buildup, and then stop tweaking and start listening. Place your speakers for a natural sound, add simple acoustic treatments that blend with your decor, and accept that “good enough” is often the gateway to great enjoyment. The real measure of a great audio system is not its price tag or its technical specifications, but how often it makes you forget you’re listening to a system at all and simply get lost in the music.
Stop chasing expensive, marginal upgrades and start mastering your environment. Apply these foundational principles of acoustics, placement, and source quality today to finally diagnose your audio issues and hear what your speakers are truly capable of.