The key to a productive north-facing garden isn’t just choosing shade-tolerant plants; it’s actively engineering your space to harvest every available photon of light.
- Reflective surfaces can act as secondary suns, boosting light on your plants by up to 40%.
- Strategic pruning is not about removal, but about creating architectural ‘light channels’ into dense foliage.
Recommendation: Before planting anything, map your garden’s unique light patterns throughout the day. This simple audit is the foundation for all successful light harvesting strategies.
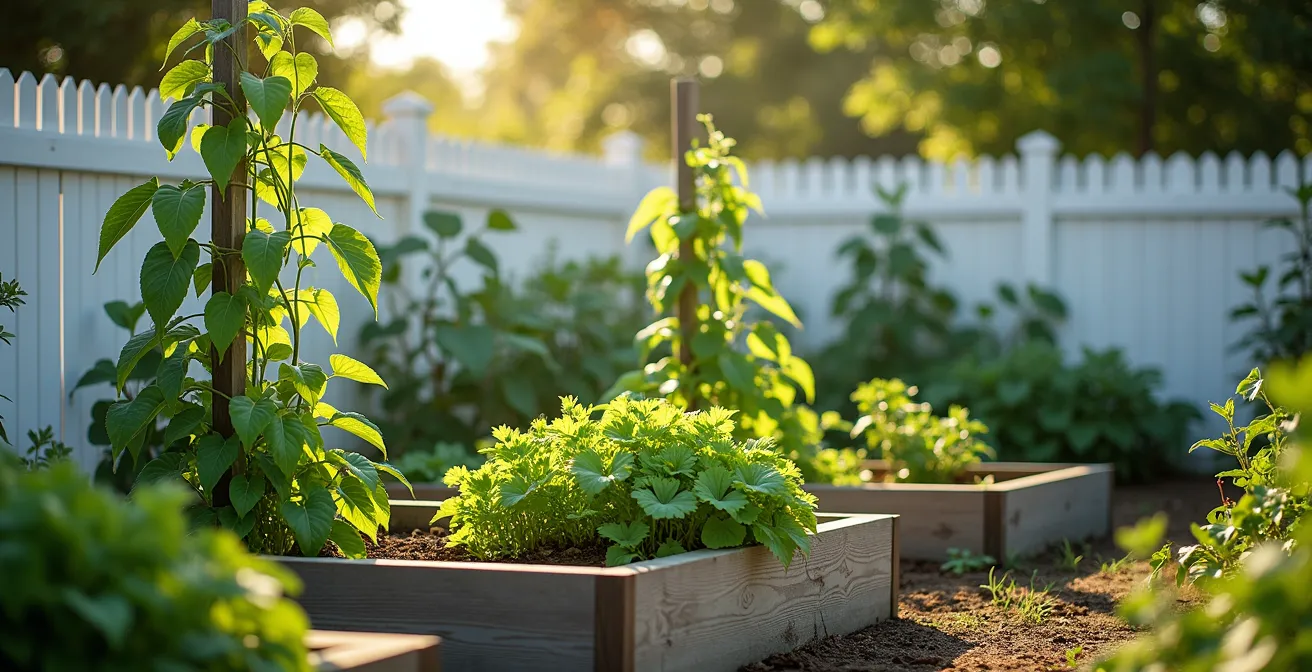
For many urban gardeners, a north-facing plot feels like a horticultural death sentence. That familiar feeling of a sun-starved garden, where even the most resilient plants seem to stretch and sigh for a sliver of direct light, can be deeply discouraging. The common advice is often a mix of compromise and resignation: stick to leafy greens, learn to love hostas, and forget about sun-loving crops like tomatoes or peppers. These suggestions, while practical, treat shade as an immutable problem to be endured rather than a challenge to be engineered.
But what if the entire approach is wrong? What if the secret to a thriving north-facing garden isn’t about passive acceptance, but about active intervention? The true challenge isn’t the lack of sun, but the inefficient use of the light that is available. By shifting your mindset from a simple gardener to a “light engineer,” you can transform your space. This isn’t about finding magic plants that grow in the dark; it’s about mastering the art of photon management—capturing, redirecting, and concentrating every precious ray of light to create micro-zones of productivity where you thought none could exist.
This guide will walk you through the core principles of light engineering for a shaded garden. We will deconstruct the science of light reflection, explore architectural pruning techniques, and reveal how to analyze your garden’s unique energy signature. Prepare to turn your shady plot from a source of frustration into a model of efficiency.
This article provides a detailed roadmap for transforming your sun-challenged space. Explore the sections below to master each specific technique and unlock your garden’s hidden potential.
Summary: The Light Engineer’s Guide to a North-Facing Garden
- Can White Walls Really Double Your Tomato Yield in Shade?
- Open Center Pruning: How to Get Sun into the Middle of Your Peach Tree?
- Spinach vs Peppers: What Actually Grows Without Direct Sun?
- Why Dusty Houseplant Leaves Are Starving for Energy?
- East vs West: Where Should Your Greenhouse Face for Winter Sun?
- How to Map Your Garden’s Light Before Planting a Single Seed?
- Morning Sun: Why Viewing Light in the First hour Changes Your Night?
- Thinning Cuts vs Heading Cuts: Which One Encourages Fruit Growth?
Can White Walls Really Double Your Tomato Yield in Shade?
The idea that a simple coat of paint can dramatically alter your garden’s output might sound like an exaggeration, but it’s grounded in the physics of light. In a north-facing garden, direct sunlight is a rare commodity. The majority of your light is indirect, bounced off the sky, clouds, and surrounding surfaces. A dark brick wall or a wooden fence absorbs this precious energy, effectively stealing it from your plants. A white or reflective surface, however, does the opposite: it acts as a secondary sun, catching diffuse light and bouncing it back onto your plants. This practice of enhancing surface albedo (the measure of reflectivity) is a cornerstone of light engineering.
The impact is far from negligible. In shaded conditions, some studies suggest that reflective surfaces can increase available light by 30-40%. For a sun-hungry plant like a tomato, this can be the difference between a few green fruits and a successful harvest. It’s not just about a single wall; think of your garden as a room. Any surface can be optimized: white-painted container pots, reflective mulches, or even temporary reflective panels placed strategically behind plants during key growth periods. This isn’t just a trick; it’s a fundamental strategy for augmenting your garden’s “energy budget.”
Not all reflective materials are created equal. Some provide a soft, diffuse light that is ideal for preventing leaf scorch, while others offer intense reflection that can create damaging “hotspots.” Choosing the right material is a key engineering decision.
| Material | Reflectivity % | Key Characteristics |
|---|---|---|
| Mylar | 90-98% | Specular reflection, can create hotspots if wrinkled |
| Flat White Paint | 75-85% | Diffuse reflection, evenly scatters light |
| Aluminum Foil (shiny) | 85-95% | High reflection but creates hotspots |
| Aluminum Foil (dull) | 70-80% | Less reflective, more diffused light |
Action Plan: Auditing Your Garden’s Light Reflection
- Points of contact: Download a free light meter app on your smartphone to measure the ambient light (lux) reaching your plants.
- Collecte: On a bright but overcast day, take a baseline measurement of the lux levels in your chosen shady spot.
- Cohérence: Place a large white board or a reflective panel behind the area you just measured, facing the brightest part of the sky.
- Mémorabilité/émotion: Re-measure the lux level at the same spot. Document the percentage increase to quantify the immediate gain.
- Plan d’intégration: Experiment with different materials from the table above to find the optimal balance between high reflectivity and diffuse, even light for your specific plants.
Open Center Pruning: How to Get Sun into the Middle of Your Peach Tree?
For fruit trees, especially in light-challenged environments, pruning is not just maintenance—it’s architecture. An overgrown, dense canopy is its own worst enemy, creating a deep internal shade that prevents fruit from developing and ripening. The “open center” or “vase” shape is a classic example of architectural pruning designed specifically for light penetration. By removing the central leader and cultivating three to five main scaffold branches, you create a hollow core that allows sunlight to flood the interior of the tree, reaching wood that would otherwise be unproductive.
This is crucial because fruit development has a specific light-energy requirement. Research from the Pennsylvania State Extension shows that flower bud development requires about 20% full sun during early summer. More importantly for harvest quality, producing large, sweet, and colorful fruit requires at least 25% full sun exposure during the final six weeks of ripening. Without an open structure, only the outermost leaves and fruit will receive this energy, leaving the interior barren. An open center ensures that a much larger percentage of the tree’s branches can contribute to the harvest.

As you can see in this structure, the goal is to create “light channels” that penetrate deep into the canopy. Every cut should be made with the question in mind: “Will this allow more light to reach a productive branch?” This turns pruning from a simple act of removal into a strategic design process, sculpting the tree to become a highly efficient light-harvesting structure. In a north-facing garden, where every photon counts, this level of efficiency is paramount.
Spinach vs Peppers: What Actually Grows Without Direct Sun?
While the “light engineer” mindset can help you push the boundaries, it’s also critical to work with the fundamental energy requirements of different plants. Not all vegetables have the same “energy budget.” The most significant dividing line is between plants we grow for their leaves and roots versus those we grow for their fruit. Fruiting vegetables like tomatoes, peppers, and squash are the most energy-intensive. The process of flowering and developing a fruit is a massive metabolic investment, requiring hours of direct sunlight to fuel photosynthesis.
In contrast, leafy greens (lettuce, spinach, arugula) and many root vegetables (radishes, carrots, beets) have a much lower energy demand. Their primary job is to produce vegetative growth. Because they aren’t channeling energy into creating complex fruits, they can thrive with less intense, indirect light. This is why the common advice to “plant leafy greens in shade” is correct, but understanding the *why* is more powerful. According to The Old Farmer’s Almanac, a good rule of thumb is that leafy greens like lettuce and spinach need only 3-4 hours of sun, while fruiting crops demand 7-8+ hours.
This knowledge allows you to zone your garden based on its light map. Don’t think of your garden as one shady spot; think of it as a gradient of light energy. By matching the plant’s energy needs to the available light in each specific micro-zone, you set yourself up for success.
- Full Shade (Under 3 hours of sun): This is the most challenging zone. Focus on culinary herbs like mint and chervil, or simply use it for moisture-loving ornamentals.
- Dappled or Partial Shade (3-6 hours): This is the sweet spot for a huge range of vegetables. Plant all your leafy greens here: lettuce, spinach, kale, chard, and Asian greens. Root vegetables like beets and carrots, along with peas and broccoli, will also perform well.
- Bright Indirect Light (Near reflective surfaces): This is your best chance for pushing the limits. With the boost from a white wall, you can attempt hardier fruiting crops like bush beans or even determinate (bush-type) tomatoes specifically bred for shorter seasons.
Why Dusty Houseplant Leaves Are Starving for Energy?
A plant’s leaf is a sophisticated solar panel, exquisitely designed to capture light energy and convert it into chemical fuel through photosynthesis. In a shaded environment where light is the primary limiting factor, the efficiency of these solar panels is paramount. Anything that obstructs the leaf surface is directly reducing your plant’s ability to feed itself. The most common culprit, both indoors and out, is a simple layer of dust.
A film of urban grime, dust, or pollen can act like a shade cloth at a microscopic level, blocking light from reaching the chlorophyll-rich cells below. The effect is surprisingly significant. While exact numbers vary, the principle is clear: a dusty leaf can see its photosynthetic capacity reduced by up to 50%. For a plant already struggling in low light, this is a critical loss of energy. It’s the equivalent of trying to power a home with solar panels that are covered in dirt—the potential is there, but it’s not being captured.
Keeping leaf surfaces clean is one of the simplest and most effective forms of light harvesting. A gentle spray from a hose for outdoor plants or a wipe with a damp cloth for houseplants is not just a cosmetic chore; it’s a direct boost to your plant’s energy budget. This also applies to removing anything that casts a shadow on productive leaves, such as yellowing or damaged foliage that is no longer photosynthesizing efficiently. By promptly removing these energy-draining leaves, you are redirecting the plant’s resources and ensuring the limited available light falls only on healthy, working “solar panels.”
- Weekly Cleaning: Gently hose down garden plants to remove dust and pollutants that accumulate, especially in urban areas.
- Monitor Leaf Health: Observe the intensity of the green in your leaves, an indicator of chlorophyll density.
- Strategic Removal: Promptly prune away any yellowing, diseased, or heavily damaged leaves that are shading healthy ones below.
- Foliar Feeding: After cleaning, consider applying a foliar feed with seaweed extract. This provides micronutrients directly to the leaf surface and can support overall plant health and resilience in stressful, low-light conditions.
East vs West: Where Should Your Greenhouse Face for Winter Sun?
For the dedicated light engineer, extending the growing season with a greenhouse or cold frame is the next logical step. The orientation of this structure is the single most important factor determining its performance, especially during the low-light months of winter. The conventional wisdom often suggests a south-facing orientation for maximum all-day sun. However, in a north-facing situation, this is often impossible. The choice then becomes between an east-facing or west-facing orientation, and the difference is critical.
An east-facing greenhouse captures the gentle morning sun, which warms the structure quickly after a cold night. This rapid warm-up is excellent for reducing plant stress and burning off morning dew, which can help prevent fungal diseases. A west-facing structure, conversely, receives the more intense afternoon sun, leading to higher peak temperatures. While this can be beneficial in deep winter, it also risks overheating plants in the spring and fall. For most cool-season crops grown over winter, the gentler, consistent heat of a morning-sun orientation is preferable. The most strategic placement in a north-facing yard is often a lean-to structure against the home’s east-facing wall to capture both morning light and radiant heat from the house.
The glazing material is another crucial engineering choice, balancing light transmission with insulation.
| Material | Light Transmission % | R-Value (Insulation) | Best Use Case |
|---|---|---|---|
| Glass | 88-92% | 0.95 | Maximum light transmission |
| Twin-wall Polycarbonate | 80-85% | 1.5-2.0 | Balance of light and insulation |
| Heavy-duty Plastic | 70-85% | 0.8-1.2 | Budget option, temporary structures |

Another advanced technique is to place a cold frame against the north-facing wall of your house. While this seems counterintuitive, the wall itself acts as a massive thermal mass. It absorbs heat during the day (even from ambient air) and slowly radiates it back into the cold frame at night, protecting plants from the worst of the cold. This turns the “problem” of a north wall into a climate-moderating asset.
How to Map Your Garden’s Light Before Planting a Single Seed?
The single most powerful action a light engineer can take is to stop guessing and start measuring. A north-facing garden is not a uniform block of shade; it is a complex mosaic of shifting light and shadow that changes with the time of day and the time of year. To truly maximize your yield, you must first create a “light map”—a detailed survey of your garden’s unique energy signature. As one frustrated gardener on a north-facing patio noted, “my plants maybe see a couple of rays of sun for a total of half an hour per day.” Knowing exactly where and when that half-hour occurs is the key to unlocking its potential.
This audit doesn’t have to be complicated. Using a simple smartphone app or just careful observation, you can create a grid of your garden and record the duration of direct and indirect light each section receives. This map becomes your master plan, allowing you to move beyond generic advice and make precise, data-driven planting decisions. You’ll discover surprising pockets of bright, indirect light near a reflective wall or identify a “full sun” zone that only exists for two hours in the late afternoon. This is information you can act on, placing a sun-hungry herb in that brief sunny spot or reserving the deepest shade for mint.
Creating this map is the foundation of everything. It allows you to practice precision gardening, matching the right plant to the right light budget, and turning a challenging space into a highly optimized system. Follow these steps to conduct your own light audit.
- Create Your Grid: Divide your garden space into a simple grid, using string or stakes to mark out 1×1 meter squares.
- Choose Your Tools: Use a dedicated smartphone app like Sun Seeker or Sun Surveyor, which can track the sun’s path and measure light intensity (lux or foot-candles).
- Take Regular Readings: In each square of your grid, take a light reading three times a day: once in the morning (e.g., 9 am), once at midday, and once in the afternoon (e.g., 3 pm).
- Record and Visualize: Note your findings on a spreadsheet or a piece of graph paper. Tally the total hours of direct sun each square receives.
- Create a Heat Map: Color-code your grid map to visualize the light patterns: red for Full Sun (6+ hours), yellow for Partial Sun (4-6 hours), and blue for Bright Shade (less than 4 hours).
- Observe Seasonally: For ultimate precision, repeat your measurements at different times of the year, such as the spring equinox and the summer solstice, to understand how the sun’s angle affects your garden’s light map.
Morning Sun: Why Viewing Light in the First hour Changes Your Night?
Not all sunlight is created equal, particularly when you’re working with a limited supply. In a shaded garden, the distinction between morning sun and afternoon sun is a critical engineering variable. Morning sun (from an east-facing exposure) is often considered superior for vegetable production in marginal conditions. It arrives when temperatures are cool and humidity is higher, allowing plants to photosynthesize efficiently without the stress of excessive heat and water loss (transpiration).
Afternoon sun, by contrast, is far more intense and strikes when air temperatures are at their peak. Plants may actually shut down their stomata (leaf pores) in extreme afternoon heat to conserve water, effectively pausing photosynthesis even when light is abundant. Therefore, a garden that receives three hours of gentle morning sun can often be more productive than one that receives three hours of scorching afternoon sun. In fact, research shows that 3 hours of morning sun can equal the productivity of 3 hours of afternoon sun, but with significantly less water loss and heat stress on the plant.
This principle has profound implications for cool-season crops, which are the backbone of a shade garden. As gardener Katy in the Garden observes, this effect can be used strategically.
I find my spinach, pak choi and lettuce do much better in the shady beds where they don’t bolt so easily in the early summer. Similarly, fiery salads like rocket, mizuna and radishes will keep a milder flavour in gentle shade relative to baking sun.
– Katy, Katy in the Garden
By positioning these crops to receive primarily morning light, you can prevent them from “bolting” (flowering prematurely) and extend your harvest. The gentler light also helps maintain a milder, more pleasant flavor in salad greens. Understanding and leveraging the qualitative difference between morning and afternoon light is an advanced tactic in the light engineer’s toolkit.
Key Takeaways
- Your north-facing garden is not a single shady spot, but a mosaic of light microclimates that you can map and manage.
- Light is a resource to be harvested. Use reflective surfaces and clean leaves to capture every available photon.
- Pruning is architecture. Sculpt your plants to create open structures that allow light to penetrate deep into the canopy.
Thinning Cuts vs Heading Cuts: Which One Encourages Fruit Growth?
Once you’ve sculpted the main architecture of a fruit tree, the focus shifts to annual pruning that maintains the balance between vegetative growth and fruit production. Here, the light engineer must understand the profound difference between two basic types of cuts: heading cuts and thinning cuts. A heading cut involves shortening a branch, which stimulates a burst of dense, bushy growth right below the cut. This is useful for shaping young trees but disastrous for light penetration in a mature tree, as it creates a thick outer shell of foliage that shades the interior.
A thinning cut, in contrast, is a more strategic move. It involves removing an entire branch back to its point of origin on a larger limb or the trunk. This cut does not stimulate a riot of new growth. Instead, it opens up the canopy, improving air circulation and, most importantly, allowing light to reach the remaining branches. It effectively redirects the tree’s energy from supporting redundant wood to fueling the development of high-quality fruit on the branches that are left. For a light-starved garden, thinning cuts are almost always the superior choice.
The Virginia Tech Extension offers a powerful analogy to understand the difference in resource allocation.
A heading cut is like giving a company 100 new, unfunded projects. A thinning cut is like canceling 5 failing projects to fully fund the 3 most promising ones.
– Virginia Tech Extension, Pruning Peach Trees Publication
This mindset is perfect for the light engineer. By making strategic thinning cuts, you are eliminating the “failing projects” (shaded, unproductive branches) to fully invest the tree’s limited energy budget in the “most promising ones” (branches with the best access to light). This focused investment is the key to producing quality fruit in a challenging environment.
- Focus on Removal: Prioritize removing entire branches that are crossing, growing downward, or crowding the center of the plant.
- Eliminate “Water Sprouts”: Remove the vigorous, non-fruiting vertical shoots that often erupt from main branches and create dense shade.
- Maintain Spacing: Ensure that the remaining fruiting wood is spaced adequately (typically 4-6 inches apart) to allow light to reach all sides.
- Redirect Energy: Every thinning cut is a decision to stop wasting energy on a poorly positioned branch and redirect it to a better one.
By adopting the mindset of a light engineer, you can move from passively accepting shade to actively managing it. Start today by mapping your garden’s unique light patterns, and you’ll be on your way to transforming your challenging space into a productive oasis.